Radon is a naturally occurring radioactive gas that can seep into your home from the soil, posing significant long-term health risks if present in elevated levels. As homeowners become increasingly aware of the hazards associated with radon, the decision between professional and DIY testing methods frequently arises. In this comprehensive guide, we delve into the nuances of both approaches, examining their benefits, drawbacks, and practical considerations so you can make an informed, confident decision regarding your radon testing needs.
Understanding Radon and Its Health Implications
Radon is a decay product of uranium found in soil and rock beneath homes and buildings. In enclosed spaces, such as basements and living rooms, radon can accumulate over time, leading to prolonged exposure that increases the risk of lung cancer.
For perspective:
- Radon is the second leading cause of lung cancer after smoking.
- The U.S. Environmental Protection Agency (EPA) recommends that homeowners take action when radon levels exceed 4.0 picocuries per liter (pCi/L).
Because radon is invisible and cannot be sensed by humans, the risk exists whether or not you perform routine tests. This is why understanding the different testing methods is crucial. Weighing the benefits of a professional test against the convenience of a DIY kit can help ensure that the chosen approach meets your specific needs and budget.
Today’s Homeowners: A Growing Awareness
With increasing public awareness about indoor air quality matters, there is a clearer understanding of the relationship between radon exposure and health risks. This enhanced awareness has led many to revisit their indoor air quality plans. However, whether you choose a professional testing service or opt for a DIY solution, the decision should be based on an analysis of factors that include accuracy, convenience, cost, and the level of expertise required.
Choosing Between Professional and DIY Radon Testing
At its core, the decision between professional versus DIY radon testing boils down to a balance between cost-effectiveness, precision in measurement, and convenience. Let’s examine both methods in detail.
Professional Radon Testing
Professional radon testing services involve certified experts who use specialized equipment to measure radon levels accurately. This method is ideal for homeowners who want a quick, reliable assessment without the added worry of interpreting complex results on their own.
Key Benefits of Professional Testing
- Expert Supervision: Certified professionals are well-versed in radon measurement protocols and standards.
- High Accuracy: Advanced instruments and adherence to strict testing procedures ensure that measurements closely represent your home’s actual radon levels.
- Detailed Reporting: In-depth reports often include graphical representations, remedial recommendations, and clear, actionable insights.
- Faster Results: Many professional testing services offer rapid turnaround times, minimizing the period during which your home might be exposed to high radon concentrations.
- Comprehensive Assessment: Professionals can identify potential entry points for radon, and suggest immediate measures to reduce its levels.
Potential Drawbacks
- Higher Cost: Professional testing generally entails greater upfront expense compared to DIY kits.
- Scheduling Delays: Depending on seasonal demand, it might take some time to secure an appointment.
- Limited Availability: In certain areas, there might be fewer licensed professionals, which could lead to longer wait times.
If you prefer the reassurance that comes from expert handling and are willing to invest a bit more for enhanced reliability, professional testing is a robust choice.
DIY Radon Testing
DIY radon testing kits have become increasingly popular, particularly for those who appreciate their ease of use and cost-effective nature. These kits allow homeowners to conduct tests on their own, yielding results after a specified period.
Key Benefits of DIY Testing
- Affordability: DIY kits are significantly less expensive compared to hiring professionals.
- Convenience: A DIY kit can be purchased online or at a local hardware store and used at your convenience—the process is typically straightforward.
- Immediate Access: Homeowners can begin testing right away without the need to schedule appointments.
- Flexibility: Multiple tests can be conducted in different areas of your home, which may help in identifying specific hotspots where radon accumulates.
Challenges of DIY Testing
- Accuracy Concerns: While many DIY kits can provide reasonably accurate results, they might not be as precise as tests conducted by certified professionals.
- Interpretation: Without professional guidance, reading and interpreting the results correctly can sometimes be challenging.
- Environmental Sensitivity: Proper test placement is crucial. Errors in placement, such as near drafty windows or heat sources, can skew the results.
- Limited Scope: DIY kits often measure radon at a single point in time and may not account for daily or seasonal variability.
For those considering the DIY approach, here are some practical tips to ensure the best possible results:
- Follow the kit’s instructions meticulously, paying close attention to placement guidelines.
- Consider repeating tests across different seasons to get a more comprehensive picture.
- Compare your results to those obtained in professional testing if possible.
Cost Considerations and Long-Term Value
When making the choice between professional and DIY radon testing, cost is a significant factor. While DIY kits offer a lower upfront expense, it is important to remember that the lowest cost option might not always provide the peace of mind you need. The accuracy of the test and reliability of interpretation are paramount when considering your home’s safety.
Cost Analysis
- Professional Testing: Although more expensive upfront, you benefit from the precise measurement and detailed insights that professionals offer. In many cases, the cost is justified by the avoidance of potential health risks and the reassurance provided by expert evaluation.
- DIY Testing: Lower cost makes DIY kits appealing for first-time tests or preliminary investigations. However, if results indicate elevated radon levels, a follow-up with a professional test may be necessary, which can ultimately increase the total expense.
Long-term Value
- Accuracy and reliability in testing can prevent future medical expenses and costly remediation if radon levels have been underestimated.
- The detailed reporting from professional tests can guide you in effective remediation, ensuring that any mitigation efforts are appropriately targeted.
- Opting for a professional service may also streamline the process if selling your home or negotiating with insurers, as certified radon testing results are often preferred.
Practical Scenarios: When to Choose Which Option
The choice between professional and DIY testing ultimately depends on your unique situation. Consider the following scenarios to guide your decision-making process:
Scenario 1:
First-Time Homeowner: If you have recently purchased an older home or a property with unknown testing history, beginning with a DIY test can offer a preliminary insight. Should the results approach concerning levels, you can then transition to professional testing for detailed evaluation.
Scenario 2:
Long-Term Resident with Health Concerns: If you have been living in your home for a long time and have concerns about cumulative exposure, professional testing is advisable. The expert assessment not only measures current radon levels but also identifies structural issues and common radon entry points in your home.
Scenario 3:
Budget-Conscious Homeowner: For those managing a tight budget, a DIY radon kit offers an affordable entry point. Even in this scenario, plan for the possibility of a follow-up professional test if initial results suggest radon levels above recommended guidelines.
Scenario 4:
Home Sellers: When preparing a home for sale, having a professionally conducted radon test report increases buyer confidence and may expedite the sale process. In competitive housing markets, this extra assurance can be a significant selling point.
Recommendation and Expert Advice
While both testing methods have their merits, the final choice should be based on personal priorities, such as budget restrictions, the desired level of certainty, and the extent to which you want detailed insights into your home’s environmental health.
Here are a few expert recommendations:
- Use DIY Tests for Initial Screening: If radon levels are unknown, a DIY kit can serve as an introductory measure. Consider following up with a professional test if results are near or above the EPA’s action level.
- Trust in Professional Testing for Complete Peace of Mind: For homeowners who value detailed analysis and immediate actionable results, professionally administered tests provide a comprehensive overview and validate that every corner of your home is safe.
- Maintain Regular Testing: Radon levels can fluctuate with weather conditions and home modifications. Regardless of the testing method, periodic retesting—every two years or after major renovations—is essential for maintaining a safe home.
Implementing Mitigation Measures
The ultimate goal of testing is to ensure that radon levels stay below the threshold where they pose a risk to health. If elevated levels are detected, mitigation strategies become the next priority. Whether following a DIY test or a professional assessment, knowing the available remediation options is vital.
Common Mitigation Options Include
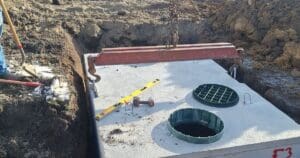
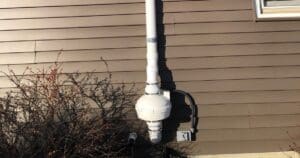
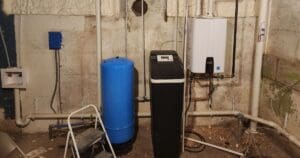
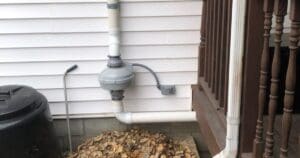
- Sub-slab Depressurization: This method involves creating a suction point beneath your home’s foundation to draw radon outward before it can enter the living space.
- Sealing Cracks and Openings: Although less effective on its own, sealing entry points in the foundation can reduce the volume of radon entering your home.
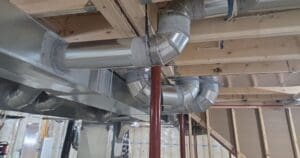
- Ventilation Improvement: Increasing the ventilation in basements and crawl spaces can help reduce radon concentrations by dispersing the gas more effectively.
For each of these mitigation options
- Professional consultation is recommended to assess your home’s structure and determine the most effective strategy.
- Many certified professionals offer mitigation packages that include both testing and remediation, ensuring a seamless transition from detection to action.
Key Takeaways and Final Thoughts
Choosing between professional and DIY radon testing is not a matter of simply opting for one over the other—it’s about evaluating your unique circumstances and making an informed decision based on a balanced analysis of cost, accuracy, convenience, and the potential long-term impact on your health.
To summarize:
- DIY tests are excellent for preliminary screening and budget-conscious homeowners, but careful attention must be given to proper test placement and result interpretation.
- Professional tests, although more expensive, offer unmatched precision, detailed reporting, and actionable insights to safeguard your home effectively.
- Regular testing and, when necessary, prompt mitigation are essential steps in keeping radon levels within safe limits, regardless of the initial testing method employed.
For homeowners committed to ensuring their indoor environment is healthy and secure, taking proactive measures is key. Our team of certified professionals is dedicated to helping you navigate the complexities of radon testing and remediation, offering expert guidance tailored to your home’s needs.
In conclusion, ensuring that your home is free of harmful radon levels is an investment in your family’s well-being. Both professional and DIY testing methods have their respective roles, and with the proper approach, you can maintain a healthy, radon-safe living environment. With a commitment to regular testing and prompt action when necessary, you can enjoy the peace of mind that comes with knowing you’ve taken proactive steps for your home’s health.